Saturday 19 July 2014

Minerva Blogger Network - Vintage shirt dress

Hot on the heels of finally posting my reveal of my party dress, it's time for my July make.

Cat photobomb!
I've had this vintage pattern in my stash for about 6 months and just fell in love with the notched yoke and cute collar so it wasn't going to languish unused for long!

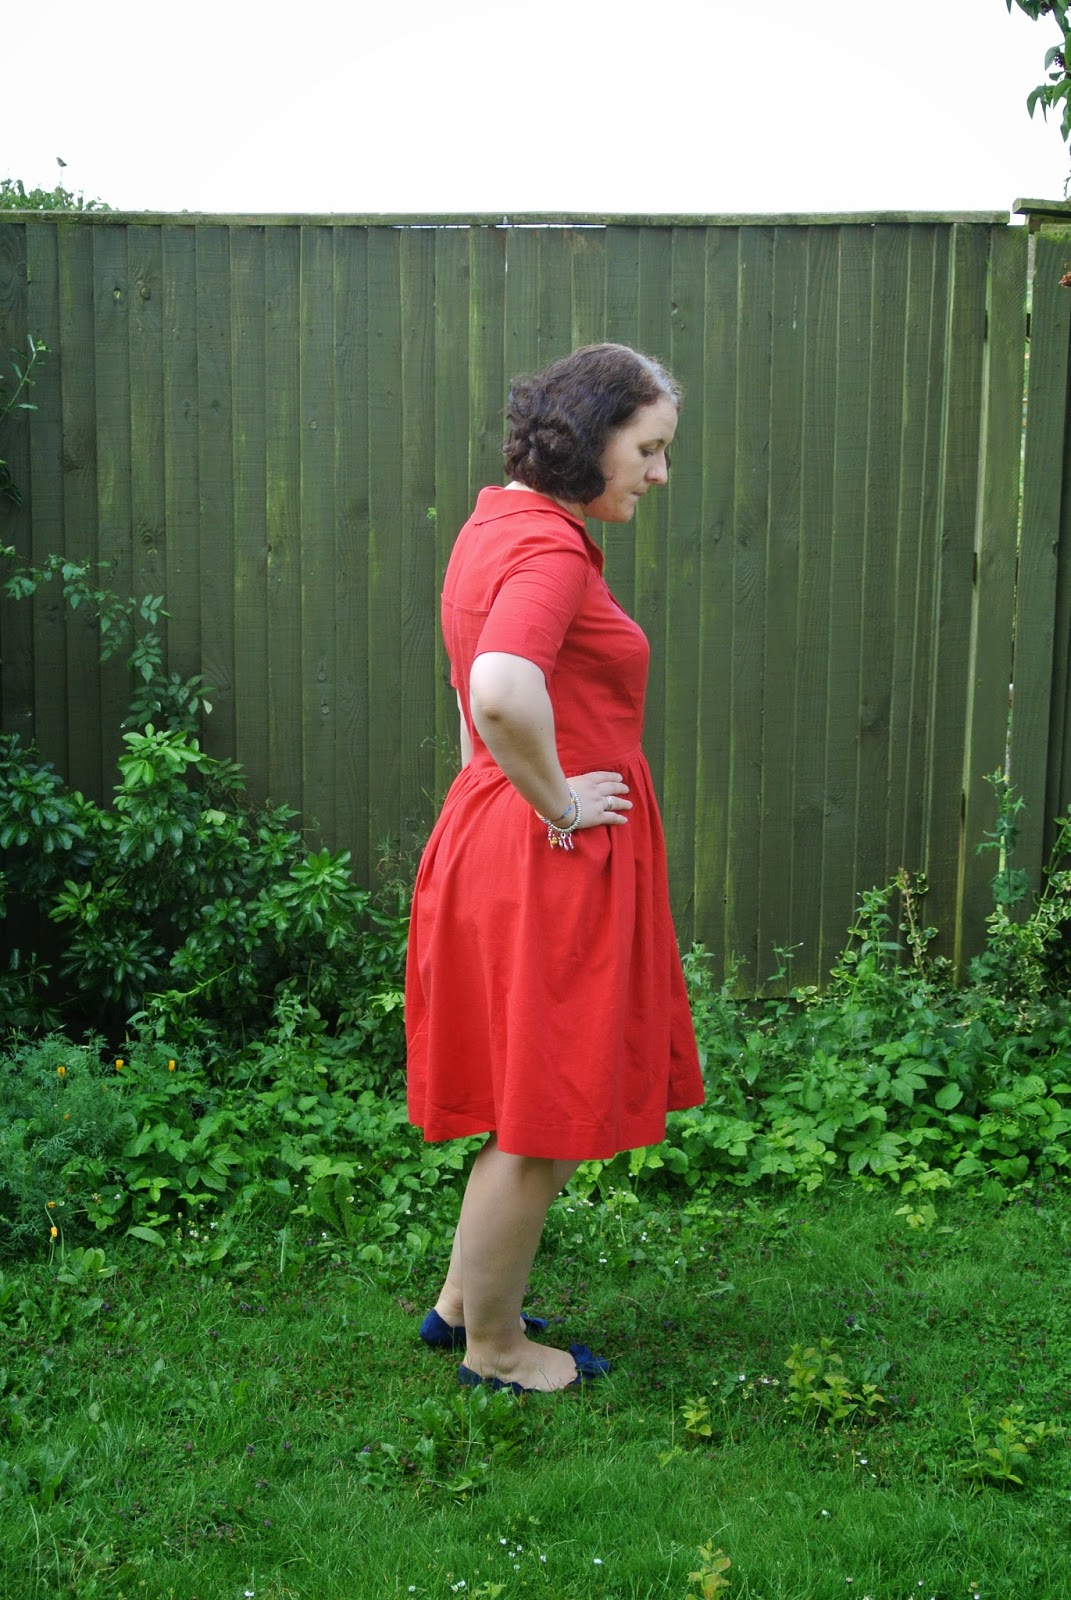
I ordered some linen look cotton that Kathryn used for this dress, and it's really lovely.  It's lightweight but with a lovely textured linen finish (and it doesn't crease as much as linen does either!).  I wore this on a pretty hot day and it was lovely and cool.  For the £4.99 a metre price tag it's great and comes in a huge range of colours.  I went for red, and it's just the colour of red I like - not too orangey.


As I was running out of time on this make, I tissue fitted the tracing and found that my usual adjustments were fine, so I did a small FBA and lengthened the bodice by 2".


Although there are a huge number of pattern pieces for the bodice - the front and back both have bodices, yokes, bodice facings and neck facings, this came together really quickly and easily.  The construction method to get the lovely notches involved attaching a bodice facing piece to the bodice piece which is turned and pressed and then topstitched to the yoke piece.  I couldn't quite understand it reading the instructions until I actually tried and it was pretty easy and gave a great finish.


I decided not to use the pleated skirt pieces that came with the pattern as the bottom hem would have measured 83" which seemed crazy!  The skirt pattern had 3 pieces - 2 side pieces and a back piece.  I went for a simpler gathered rectangle using the Emery pattern pieces as a guide to size and length, and positioned the seams at centre front and centre back to allow for the front opening.  I used the same method of finishing the skirt edges as the patterns uses - the top edges under the notches (which I transferred from the vintage pattern pieces) are finished using bias tape and turned under, and then the gap is left open.  I stitched on a couple of hooks and eyes in the hope of holding this closed but as this hasn't been all that successful, I think I will add another couple of buttons on to avoid knicker flashing (and contrast bias tape flashing - this cherry print bias is adorable but I probably would go for matching stuff with hindsight!).


The pattern calls for covered buttons, which I ordered as part of my kit from Minerva.  However I had a total fail with these!  The teeth didn't seem to want to grab the little circle of fabric and when I finally got it all tucked in, the back wouldn't stay on - anyone got any tips on how to use these?  I went with some buttons from the stash instead.  The front of these buttons felt a bit fancy for the style, so I flipped them over and used the other side.

The only other change I made was to move the button placement a bit as it was more flattering to have them starting lower down.

I'm really happy with this dress - it's lovely and cool and easy to wear, and it feels like a vintage dress on.  Perfect for the warm weather we've been having (long may it continue!).  And this is item number 2 for my Vintage Pledge!


Minerva are working on their website currently so rather than one link to my kit, here are the links to the individual components of it if you want to make a similar dress for yourself!


Friday 18 July 2014

Reveal - the Disco Apocalypse dress


Somewhat belatedly, here's my Minerva Crafts make for June (I thought I had already posted this, so it's even later than expected!)


As you might remember we had to make a party dress to celebrate Minerva's win at the British Sewing Awards and to wear to the meet up at the Crafts Centre. Due to unforeseen circumstances I couldn't make the meet up and  a bit late in photographing and blogging my final dress!

As per my preview post, I used pewter sequinned lace to fulfil my hankering after a lace dress, and lined it with navy lining to make the lace pattern really stand out.  This worked well and I much preferred it to matching or nude lining.

I had initially planned to make a straight By Hand London Flora with the wrap bodice but when the lace arrived I realised it had a scalloped edge which I wanted to show off. So I looked for a pattern with a full skirt that was cut straight across the hem and settled on Gather Mortmain. I love how the pleats look on the skirt!

I underlined the bodice with the navy lining and basted them together.  I also marked the darts with basting stitches so that the two layers didn't separate and make the darts wonky. I also spent a lot of time unpicking sequins from the seam lines.  I'm not sure whether this was totally necessary or whether I could have sewn over them. But this gave rise to the name of the dress - by the time I had cut the lace and unpicked sequins my house was covered in glitter and it really did look like the Disco Apocalypse had arrived! We are still finding sequins now!

I also lined the bodice as per the pattern instructions. Due to the contrast, understitching was really needed with this dress to stop the lining peeking out.

I decided not to line and underline the skirt as I had intended, and just went for underlining.  I cut my pattern pieces in lining and hemmed them by machine. I then lined them up with the point on the fabric where I wanted the hem to fall so that I could have the scallops extending out at the bottom. I used french seams to finish the side seams.


I sewed it with my walking foot throughout and I was really happy with the results as it definitely stopped the layers from shifting! The only issue was on the side seams of the skirt where it doesn't sit perfectly - you can see this in the side view above. I suspect this is to do with attaching the lining to the skirt as underlining and the heavy lace wanting to pull down more than the lighter lining. Anyone able to shed more light on this?

The bodice is a bit wrinkly but again I think this it mainly due to the lace pulling down slightly more than the lining. I could probably have fixed it by taking out a lot of the ease but I wanted a slightly looser fit for eating and dancing!

The zip does actually do up all the way. Damn.
The name is based on the state of my living room floor after cutting this fabric - it looked like a glitter ball had exploded!  We are still finding sequins now (yes, I do clean - sometimes!).

Sorry I missed the party Vicki and all at Minerva - I hear it was a good one!

Monday 7 July 2014

Spring Sewing Swap


I was so excited to participate in the Spring Sewing Swap this year organised by the lovely Kerry from Kestrel Makes.  It's one of the things I really loved when I first got into the world of sewing blogs.

I was paired up with Emma Jayne from Clipped Curves.  if you don't already follow her blog, you should as she makes excellently fitted garments (check her sailor trousers!) with a nautical flair.  Basically I want to be her when I grow up!

She also lives quite close to me so we are hoping for a meet up for coffee and sewing chat some time soon!

Here's the lovely bundle she sent me:


Navy twill
a lightweight bird print cotton
navy twill tape
cute stripy buttons

plus this excellent vintage A-line skirt/ culottes pattern (with pockets!  I love pockets!)

Hop over to Emma Jayne's blog to see what was in the parcel I sent her (being much more organised than me, she has already blogged about it here!).

Thanks for organising Kerry - roll on next year!