Showing posts with label summer dress. Show all posts

Friday, 13 May 2016

The Texan flower frock


So its been a while!

As part of my MeMadeMay pledge (to wear totally me made except underwear), I added that I wanted to make 4 new garments and write 4 blog posts. I always find that however much I enjoy doing something, sometimes I need a push to do it if I haven't done it in a while!

I have been getting into the whole decluttering/ minimalism thing recently (I have marshalled my thoughts into a separate post to come) but overall I want to use patterns and fabric I have already rather than buying more. So this uses a piece of fabric i bought from Joanns when I was in Dallas last year. I met up with Brooke from Custom Style and she kindly took me shopping (and burrito eating), armed with loads of coupons so I could take full advantage of the cheap prices vs the UK.

This is a quilting cotton in a gorgeous dark floral print.  The selvage says it is a Joanns exclusive. I don't have an issue with quilting cotton for dresses but I have generally used "designer" ones. This is definitely less good quality than those. It's much stiffer and I found a few flaws in it (after i had cut unfortunately!). So it needed a pattern that didn't need drape and I chose the Deer and Doe Belladone which i picked up in their Black Friday sale back in November. The a-line skirt works fine in the stiffer fabric.

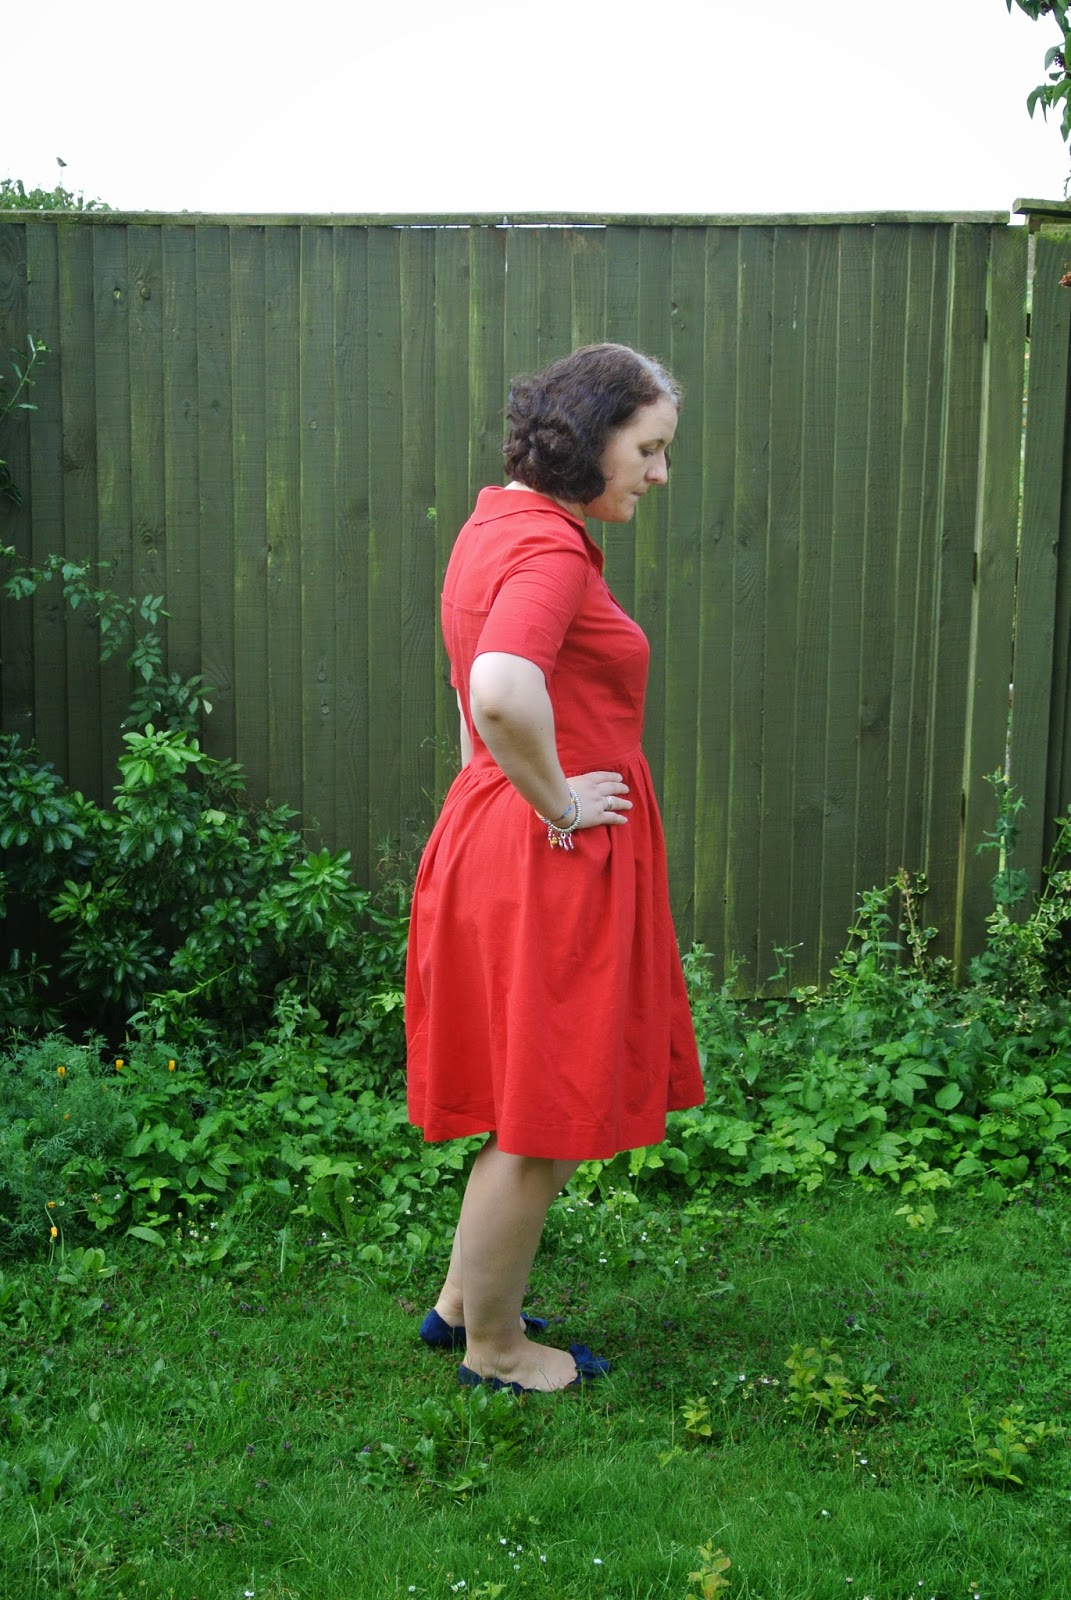
I didn't realise the hands on waist was causing  back wrinkles and hubby obv didn't notice (grr bad bloggerhusband)

I may be the only blogger who has made this up with the plain back! I had intended to make the open back version but when I muslined I wasn't sure that it was very me. I might make another version for summer with the open back though.

I did my usual round of alternations - a small FBA, lengthening the bodice by 1.5", lowering the bust darts by 1" and lengthening  the skirt by 2". After muslining I lowered the bust darts another 1".  
In the final version, the bodice could probably be 1" longer and the skirt would hit slightly closer to the knee. However it is totally wearable as is and I'll make this change on future versions.

Ignore derpface please


Sorry for the phone pics in this post. On the day we took these we went to Windsor, hubby brought his Go Pro and assured me the pics would be brilliant. However if you have ever seen your backside in a fisheye lens, you'll realise why people normally use them for landscapes! So back up phone photos it is!

Monday, 22 September 2014

The long awaited Moneta


I sewed this forever ago, but as you have probably noticed, finding time to blog things recently has been difficult!

I made this Moneta from Colette Patterns for our holiday to Sicily back in August, and it's great to look back on the beautiful scenery and lovely weather!  The pictures are on the island of Stromboli (an active volcano) where we went on a boat trip.

There seemed to be a lot of relatively similar knit dress patterns released by the indies this summer, and although I probably could have hacked this myself, I decided to go the convenience route.  I also love this neckline - it's perfect for me, and the downloadable collar options sealed the deal!  Annoyingly I don't have a pic of the cute crossover collar at the back so you'll need to imagine.


It's a simple knit bodice with no darts and a gathered skirt.  I lengthened both the bodice and skirt by 2" based on measuring the pattern pieces - this is a standard adjustment for me,  The only fitting issue I had was some gaping under the arms.  To get rid of it, I pinched it out at the side seam - it's not perfect but it worked OK.

I'm not sure about the gathering method used on the skirt - it calls for clear elastic to be stretched and sewn to the skirt which gathered it up when the stretch is released.  It really wasn't that easy to do.  I'll probably give it another go on another version I have planned, but I suspect that other gathering methods may be just as easy.

This pattern is a total fabric hog for such a simple knit dress!  I had bought 2.5 metres of this cotton jersey from Goldhawk Road without checking the fabric requirements, but as it's a self lined bodice, the pattern calls for close to 3 yards.  With my length adjustments, I wouldn't have had enough to line, so I overlocked the armhole edges and turned inside.  I finished with a double needle.


An arty shot from my husband - he loved that the writing on the wall matched the dress!
I love this dress - the fabric is quite weighty and the skirt swishes really nicely,.  It's quick and easy to make, and I have a winter version in the works now that the weather is getting colder.  I had plans for a striped version too but didn't manage to find the right fabric.  Maybe for next summer!


Wednesday, 20 August 2014

Minerva Blogger Network - The Polkadot Frock


I love polkadots but realised recently I have hardly any polkadot items that are in regular rotation!  When I saw this lovely navy polkadot stretch cotton on the Minerva site, I decided to rectify the situation.

The fabric is a really lovely weight – not too stiff but not especially drapey.  It’s not as smooth as sateen but has a lovely feel to it.  Of course, the stretch makes it really easy to get a good fit and it’s lovely to sew with.


I’ve been meaning to make another Anna dress for ages – no idea why I haven’t got around to it before now!  Probably just distracted by newer, shinier patterns!  The boat neck is my favourite neckline and I love the fit of the bodice and the kimono sleeves.  It’s also super quick to sew with no sleeves to set in..  I wanted to change up the skirt, and while on holiday, I realised that the full skirt from my Mad Men vintage dress pattern is pretty much my perfect skirt style so I used that.

I had already fitted the Anna bodice, lengthening by 2”, doing a ½” FBA and adding a couple of inches to the waist.  I measured the waist, subtracted the seam allowances and adjusted the skirt pattern to ensure that it was the same size so that the side seams would match up.  In a fit of paranoia, I added an extra 2” at the waist which I later ended up removing.

I had added the pockets from the Emery pattern as I really like the way they are joined into the waist seam and so don’t flap around like some side seam pockets can do.  Unfortunately when I had to take out the extra at the waist, I had to remove the pockets to make the skirt sit correctly over the hips.  But I’ll definitely use them against next time.


I must remember next time that the skirt on this pattern Is really long – I took 5” in length off, leaving  2.5” hem and I’m 5’9”.

All the seams are finished with overlocking.

I had planned to do a blind hem by machine.  I spent some time working out how to do it and then decided to sew in by hand using a catch stitch.  The end result is lovely but this is a seriously long hem to sew by hand!

I’m really happy with this dress – I can wear it now with bare legs and later in the year with tights and boots so it’s going to be really useful.

If you want to make a dress like this, the kit from Minerva includes 3m of polkadot stretch cotton and an invisible zip (links to the individual items rather than the kit link while the new website is under construction):


Saturday, 19 July 2014

Minerva Blogger Network - Vintage shirt dress

Hot on the heels of finally posting my reveal of my party dress, it's time for my July make.

Cat photobomb!
I've had this vintage pattern in my stash for about 6 months and just fell in love with the notched yoke and cute collar so it wasn't going to languish unused for long!

I ordered some linen look cotton that Kathryn used for this dress, and it's really lovely.  It's lightweight but with a lovely textured linen finish (and it doesn't crease as much as linen does either!).  I wore this on a pretty hot day and it was lovely and cool.  For the £4.99 a metre price tag it's great and comes in a huge range of colours.  I went for red, and it's just the colour of red I like - not too orangey.


As I was running out of time on this make, I tissue fitted the tracing and found that my usual adjustments were fine, so I did a small FBA and lengthened the bodice by 2".


Although there are a huge number of pattern pieces for the bodice - the front and back both have bodices, yokes, bodice facings and neck facings, this came together really quickly and easily.  The construction method to get the lovely notches involved attaching a bodice facing piece to the bodice piece which is turned and pressed and then topstitched to the yoke piece.  I couldn't quite understand it reading the instructions until I actually tried and it was pretty easy and gave a great finish.


I decided not to use the pleated skirt pieces that came with the pattern as the bottom hem would have measured 83" which seemed crazy!  The skirt pattern had 3 pieces - 2 side pieces and a back piece.  I went for a simpler gathered rectangle using the Emery pattern pieces as a guide to size and length, and positioned the seams at centre front and centre back to allow for the front opening.  I used the same method of finishing the skirt edges as the patterns uses - the top edges under the notches (which I transferred from the vintage pattern pieces) are finished using bias tape and turned under, and then the gap is left open.  I stitched on a couple of hooks and eyes in the hope of holding this closed but as this hasn't been all that successful, I think I will add another couple of buttons on to avoid knicker flashing (and contrast bias tape flashing - this cherry print bias is adorable but I probably would go for matching stuff with hindsight!).


The pattern calls for covered buttons, which I ordered as part of my kit from Minerva.  However I had a total fail with these!  The teeth didn't seem to want to grab the little circle of fabric and when I finally got it all tucked in, the back wouldn't stay on - anyone got any tips on how to use these?  I went with some buttons from the stash instead.  The front of these buttons felt a bit fancy for the style, so I flipped them over and used the other side.

The only other change I made was to move the button placement a bit as it was more flattering to have them starting lower down.

I'm really happy with this dress - it's lovely and cool and easy to wear, and it feels like a vintage dress on.  Perfect for the warm weather we've been having (long may it continue!).  And this is item number 2 for my Vintage Pledge!


Minerva are working on their website currently so rather than one link to my kit, here are the links to the individual components of it if you want to make a similar dress for yourself!


Wednesday, 21 May 2014

Minerva Blogger Network - The Swirly Smoke dress


I really love this dress - It's a great pattern, the Gather Mortmain in one of my favourite fabrics, cotton sateen.

Cotton sateen is great to work with - it's so easy to sew and that little bit of stretch makes it easy to get a great fit.  I got a swatch of a different sateen as part of the Minerva Swatch Club and decided to look at their range.  I picked this digital print as I love the colours - the swirls of purple and blue are mixed with a lovely bright turquoise.


I decided not to pattern match this exactly, but I lined up the turquoise lines in the print on the bodice and skirt which was an easy way to get continuation of the lines in the design.

This is my first Gather Kits pattern and it definitely won't be my last.  Other than adding 2" of bodice length and 2" to the skirt, I had no other alterations and it fit me perfectly! I made the sleeveless version.  I did take in around the waistband piece after it was constructed as it was a bit loose, and I may take in a little bit more at the waist after wearing.  But it is so comfortable and quick and easy to construct.  I didn't do the exposed back zip as I'm not a huge fan of them, so I replaced it with an invisible zip.


The box pleats on the skirt are really easy to do and look great.  The separate waistband piece is flattering and allows the fit to be adjusted quite easily.  I didn't have to curve the waist darts as I often have to.

If you want to make your own version, you can get a kit from Minerva here with fabric, an invisible zip and matching thread.


Friday, 9 May 2014

Sewing Inspiration - Boden

OK, hands up who looks at fashion spreads in magazines and starts trying to work out what patterns/ fabric they could hack to make it themselves? 

I recently got sent the latest Boden catalogue, and in addition to a coupon which will allow me to replace a couple of seen-better-days fine knit cardigans (if you know me in real life or follow my Me Made May daily pics, you'll see I wear these just about every day!) there are some excellent knock-off-able looks which I am considering for summer sewing.

I have been somewhat scathing about Boden in the past, totally putting them into the Yummy Mummy box, but their last few seasons collections have been great!

The Lovely Linen dress could easily be made with a Colette Pastille dress bodice with a bit of piping and a gathered skirt (like an Emery if you needed a pattern rather than just using a big rectangle!)

Source: Boden, Colette Patterns (from the Sewing Handbook), Christine Haynes
I would use a lovely blue graphic floral rather than the yellow pictured here.


The 60s Ponte Dress is a dead ringer for a sleeveless funnel necked Coco:

Source: Boden, Tilly & the Buttons

With a little bit of tweaking (stitching down the pleats a bit and adding grosgrain ribbon to the waist), Maria Denmark's Paula pleat skirt could be just the ticket to make a version of the Poppy skirt:

Source: Boden, Maria Denmark
I think with a bit of tweaking of the wrap bodice pieces and addition of some braid (perhaps in a more tasteful colour than Boden's neon orange!), Cake Patterns Tiramisu could make a fab version of the Rosie dress:

Sourc: Boden, Cake Patterns
You could use Sinbad and Sailor's new Hepworth pattern with a little bit of neckline reshaping to make your own version of the Nancy dress (what is with all the yellow Boden?):

Source: Boden, Sinbad & Sailor

Do you like the new Boden looks?  Any you are planning to recreate?  What other fashion brands are inspitring your sewing this summer (or winter if you are in the southern hemisphere!)

Wednesday, 23 April 2014

Fella, this is a line i ain't biting. That's a bona fide offer. Well, with a little moonlight and roses...


So you know what this post is going to be about! Unless you have been living under a rock (or at least not keeping up with your sewing blog reading) you'll have heard about Sew Dolly Clackett organised by the fabulous Sarah from Rhinestones and Telephones. Sarah  had the great idea to celebrate the upcoming nuptials of the very lovely Roisin and Nic by making dresses in the style of Roisin herself. And let me tell you, that girl not only has great style and a presumably immense wardrobe/shoe storage area, she always gets a perfect fit and finish on her dresses. I've never seen her in one that looked less than perfect!

Anyway, enough gushing. What's the craic with this dress?


This is my second attempt at Christine Haynes Emery dress.  The first one was a total fitting fail that I blogged about here. So for this I went back to the drawing board, retraced the bodice and made another toile. I got some really helpful comments on my post before which helped improve this one. I lengthened the bodice by 2" and moved the darts down by 1". I did my usual 1/2" FBA.  One area that was a big problem in the previous version was the shoulder width. Based on measuring the previous one, I did a broad shoulder adjustment of 1" and a 5/8" square shoulder adjustment (which I often do).

I'm pleased with the fit. An extra 1" in bodice length wouldn't go amiss but it's pretty good as is!
I used the skirt (extra 2" length) and sleeve (widened by 1" to take account of shoulder adjustment and because it was a touch tight) that I had used before.

I am quite annoyed with the pics though - they were taken in a hurry before work this morning and the dress looks seriously wrinkly which it doesn't in real life.  Damn.


Now for the fabric. This was the hardest choice! How can you narrow down all the possibilities? Roisin says this is why she makes so many dresses! I wanted to reflect her style but also make something wearable for me, and much as I love her pin up girl dresses, they just aren't me! An idea had been brewing in my brain since I remembered asking roisin on twitter to recommend some fabric for a dress. She picked one of the prints from the Michael Miller Ahoy Matey collection for me, I think this one. So the nautical idea was there and a sale on nautical prints at fabric.com sealed the deal!

This is another Michael Miller fabric called My Favourite Ship from the Out To Sea collection.  N absolutely loves it. Of course my dress needs a name, so I asked her and she has called it the Neverland Pirates dress (from the cartoon series Jake and the Neverland Pirates).

I finished this dress with moments to spare due to a nasty 24 hour bug I had over the Easter weekend (that's prime sewing time dammit!). The hem was done at 10pm the night before and I did consider machining down the lining by stitching in the ditch at the waistline.  But then I thought WWRD (What Would Roisin Do?), stuck on an episode of Elementary and hand sewed it down.


Roisin and Nic are such a lovely couple and I'm proud to count them as friends. Wishing them all the best in their future married life together! And I can't wait to see the wedding dress roisin is making!

Wednesday, 19 March 2014

Minerva Blogger Network - the almost-Anna dress


Ooh yes, and new hair too!

As the title suggests, I ordered this fabric intending it to become another Anna dress.  Then the By Hand London ladies released the Flora pattern and I fell for it hard.  I ordered it that day and crossed my fingers that it would arrive in time.


I loved the fabric as soon as I saw it and started thinking about what I could make from it – one of those rare occasions for me when I pick the pattern for the fabric instead of the other way around!  It’s a smooth and silky lightweight cotton lawn with an fan print.  There are a number of different colourways but I loved the grey-blue of this blue and orange one.  It’s lovely to work with – light but not see through. 


This is a really straightforward pattern with nothing too tricky so it would be a great first dress for a beginner.  It does use an invisible zip but the instructions are pretty clear on inserting that.

I did my usual FBA and added 1” about the bust.  I also lengthened the straps by 2” and the bodice length by ½” at the bottom.  Looking at the wrinkles on the back, I perhaps lengthened a bit too much so I’ll leave that out for the next version.  I increased the length of the skirt by cutting the longest length plus 1” – this meant that the front piece was too wide to fit on the folded fabric (you definitely need 60” wide for this).  So I folded a piece out of the side seams (leaving the waist intact) so that I could fit it on the fabric – it’s a full skirt with extra pleats so it still works fine!  I had enough fabric to cut the 2 back skirt pieces in a single layer so could use the full width.  The bodice is lined and as I was a bit worried about the print showing through I used some white lawn I had in the stash.


As ever the By Hand London instructions are really clear.  The only issue I had was getting confused between which version I was making when attaching and finishing the lining as the two are completely different - totally user error and not the fault of the pattern.  I realised after I had overlocked the back and waist seams that I wasn’t supposed to catch the lining in there, but I decided not to unpick all that overlocking even though it would have given a neater finish on the inside (lazy me!)


The only problem with this dress is that it’s a bit too summery to wear quite yet.  But I haven’t given up hope of some more sunny weather to come very soon!  I was aiming for a Lizzy-esque barefoot pic (it's in no way because I was too lazy to dig out summery shoes to go with this dress!) but my pasty legs and back garden really aren't a patch on an Aussie beach!


If you want to make your own version (with 3m of fabric so it would work for an Anna or Emery too) you can buy a kit from Minerva here.  It also includes an invisible zip and matching thread.


Tuesday, 17 September 2013

The last dress of summer


I love this fabric! I fell in love with it in Goldhawk Road at the Epic Blogger Meet up in April. Of course I have no idea of the name of the shop but it sells a lot of Liberty fabric, as well as precut packages of lawn in 3 metre cuts. The quality is lovely - the selvage confirms it is Freedom Fabrics.  I think it was £20 for 3 metres.

I was concerned I might need to line this as the fabric is so lightweight but it's really opaque. Perfect summer dress material! It's very smooth and silky - lovely to wear.

I finally used my Simplicity 2444 pattern which I got free in Sew magazine earlier this year. It took this long to get to the front of the sewing queue! And haven't other bloggers made some gorgeous versions of this pattern? Roisin has to be the 2444 queen - 7 versions (love her latest Passage over Piedmont version)! Rehanon used the bodice to great effect on her Simplex. Char from TRexes and Tiaras has made about 8! It's a popular pattern!


I love the double diagonal waist darts on this pattern. Would be great to make it in a less busy fabric so you can see them better. I was worried about doing an FBA with no bust dart but I rotated one dart up to the bust, made the adjustment and rotated it back again. Worked like  charm - thanks Twitter (as usual).

I did my usual length adjustments - 2.5" on the bodice and 2" on the skirt.  All the seams were finished on my overlocker, making it pretty speedy to put together. I was tempted to skip the facings in favour of bias tape, but Roisin advised against it. As she is the queen I went with her advice! The armhole facings are just strips of fabric anyway so probably easier to use those than to make bias!

Not sure why (and it's not hugely obvious in the pics) but I have a bit of gaping at the front neckline. Any ideas what might be causing it?  Looking at the pics I could probably stand to have a bit taken out at the waist too.


Pictures were taken in Henley - on - Thames after a full day of wear (hence the creases). But the backdrop is too pretty to pass up for want of an iron! And as it feels like summer is over now, this is definitely the last summer dress I'll be blogging for a while! 

I'm planning autumn sewing now and will be posting my plans shortly. Have you seen the Fall Essentials Sew Along that Sarah at Rhinestones and Telephones is hosting? It's a great idea so I am going to be working along with that. First stop -  wintery Anna dress! And the By Hand London ladies are hosting a sewalong too. I do love a good sewalong!

Monday, 9 September 2013

The kite - flying Hawthorn


A new Colette pattern is always a big event - those ladies are so good at marketing! From the sneaky peaks they gave us, the #sewcialists on Twitter suspected a shirt dress and I was thrilled as I've wanted to tackle one for a while. Great Colette instructions and a fab shirt dress pattern is a match made in heaven for a nervous sewist!

When I saw Hawthorn I certainly wasn't disappointed. I love the neckline and collar shape and the full skirt is so pretty. Of course Sarai and the team's lovely styling and gorgeous models always help sell a pattern to me! (Have you voted for Colette in the Martha Stewart awards by the way? Link here).
I nabbed the pattern as soon as Backstitch had it in stock and luckily the perfect fabric fell into my lap on a quick dive into Remnant Kings in Glasgow on my way home from my mum's. I spotted this lovely pale blue cotton with a textured weave and was amazed on checking the price to see that it was £5 a metre! Sold to the crazed sewist who already has far too much stuff to lug on the train back down south!


I then stupidly sat on it for a while and concentrated on other projects, I think for fear it would be too difficult. And then I realised August was marching on and I wasn't likely to have much call to wear a pale blue dress in winter so I'd better get on with it!  But I needn't have worried - Colette held my hand throughout! 


As usual I made a muslin. I cut a size 8 bodice grading to a 10 at the waist and a 10 skirt to fit the waist. I cut the skirt to the longest length.  Based on tissue fit I lengthened by 3". As the pattern said it had quite a loose fit I thought I might get away without an FBA but no such luck. The pattern only has waist darts but I decided to keep the small bust dart created rather than rotate it back and mess with side seam length! I think a broad shoulder adjustment might work well for me on the next version (oh yes, version 2 planned already!)

Spot the small-person-flashing-her-knickers photobomb?
 The only construction issue I found (in common with a few others in the Flickr group is that the collar as drafted didn't reach the circles on the neckline. Apparently if you use 1/4" seams it works fine but I had cut, sewn (with the usual 5/8" seams) and pressed collar by the time I realised! Still looking at the model and a few other finished dresses I don't think it makes much difference.
As usual I was paralysed by button choice - why is this so hard? I think it's the fear of spoiling something you've put so much work into by choosing the wrong ones. I wanted coloured ones as I feel there could be something of a nurse's uniform about the dress, but nothing was speaking to me. I tried to find vintage ones but as I needed 14 (an extra one due to extra bodice length added) I couldn't find any that seemed right. Wooden buttons might have been cute but they tend to be bigger than I would choose for a shirt dress.  I finally chose these clear flower shaped ones which I think work well.
So after the ordeal of 14 buttonholes, 3 broken needles and running out of thread half way down so that the skirt buttonholes are ever so slightly darker than the bodice ones, I read to the end of the instructions and discovered I needed to hand stitch the hem! I used a catch stitch rather than slip stitch as it's so pretty but that is one long hem! I think it took 3 evenings to do. I recently bought some beeswax which I used for the first time to coat the thread and i am sold! Amazing stuff - try it if you often get into a tangle when hand sewing! As a result I think this is some of the neatest catch stitching I have ever done!
Also as you can barely see the collar for my hair, here's a pic of it on Marjorie:
I wore the dress to a kite festival on the August Bank holiday weekend. There wasn't nearly enough wind for the kite displays although we did get a bit of flying done as well as some paddling! I got a few compliments on my Hawthorn from people in the vintage and craft tent (isn't it great to be able to say "thanks I made it"?) And had a great chat with a guy who is launching a vintage clothes range after learning to sew to make costumes for his alter-ego drag act! I love the way sewing gets you involved in such random conversations!

I picked up some fab goodies for a giveaway too which I'll be doing in a couple of weeks to celebrate passing 100 Blog Lovin followers so look out for that!

Friday, 10 May 2013

Finally, a Burda Success!

For the past few weeks I've been in a weird sewing place - somewhere between Me Made May panic and holiday sewing (we are going to Sicily in mid-May - so some of my Me Made May photos will hopefully look more exotic than my back garden/ dining room!).

But I think this dress will hopefully cover me for both.


Despite having terrible reviews from most bloggers, I actually quite like April's Burda -- it's the first one I've bought for ages! 
Source: Ooobop

In addition to the cover dress - vaguely Laurel-esque?  Ok without the huge sew-on gemstones.  I have plans for this pattern, hopefully you'll be seeing it soon, acceptable muslin permitting! - I liked this pattern:

Source:  BurdaStyle (who make it very difficult to link directly!)

I wasn't so keen on the shiny fabric but thought it could make a good basic knit dress for holiday and at home.  I had some nice navy viscose knit fabric from World Fabrics (their website isn't great, but good prices, speedy delivery and the quality seems good from what I have seen so far!).

In terms of pattern modifcations, no way was I doing welt pockets in a simple knit dress so I left them out.  The pattern includes a belt but I don't love self fabric belts for this sort of dress and thought I'd be more likely to style it with a leather belt as per the picture.

Spotted anyone?
The pattern was nice and long so no length adjustments needed.  I did take it in at the sides slightly to give it a bit more of a waist and make it more fitted around the bust.  This was really due to my fabric choice rather than the pattern as the original size would have made it too bunchy around the waist to wear with a belt.  My only annoyance was that I didn't follow my sewing spidey sense and ditch the fiddly little neckband pieces.  I wasn't clear how much seam allowance to add and it was hard to attach them over the top of the pleats at the front neckline, meaning a bit of unpicking.  But again could have been due to my fabric choice being thicker than theirs.  I should have gone with my idea of cutting a wide bias strip (or I guess i could have just cut a straight grain piece since I was using stretch fabric!), which would have been much easier.  Still, live and learn!

It's not exciting but I like it a lot - it's simple and I reckon it will get worn a lot this summer.  Now I just need to find the perfect tan sandals to wear with it!

Photobomb!