Showing posts with label fitting. Show all posts

Tuesday, 30 December 2014

Operation winter coat - the reveal!


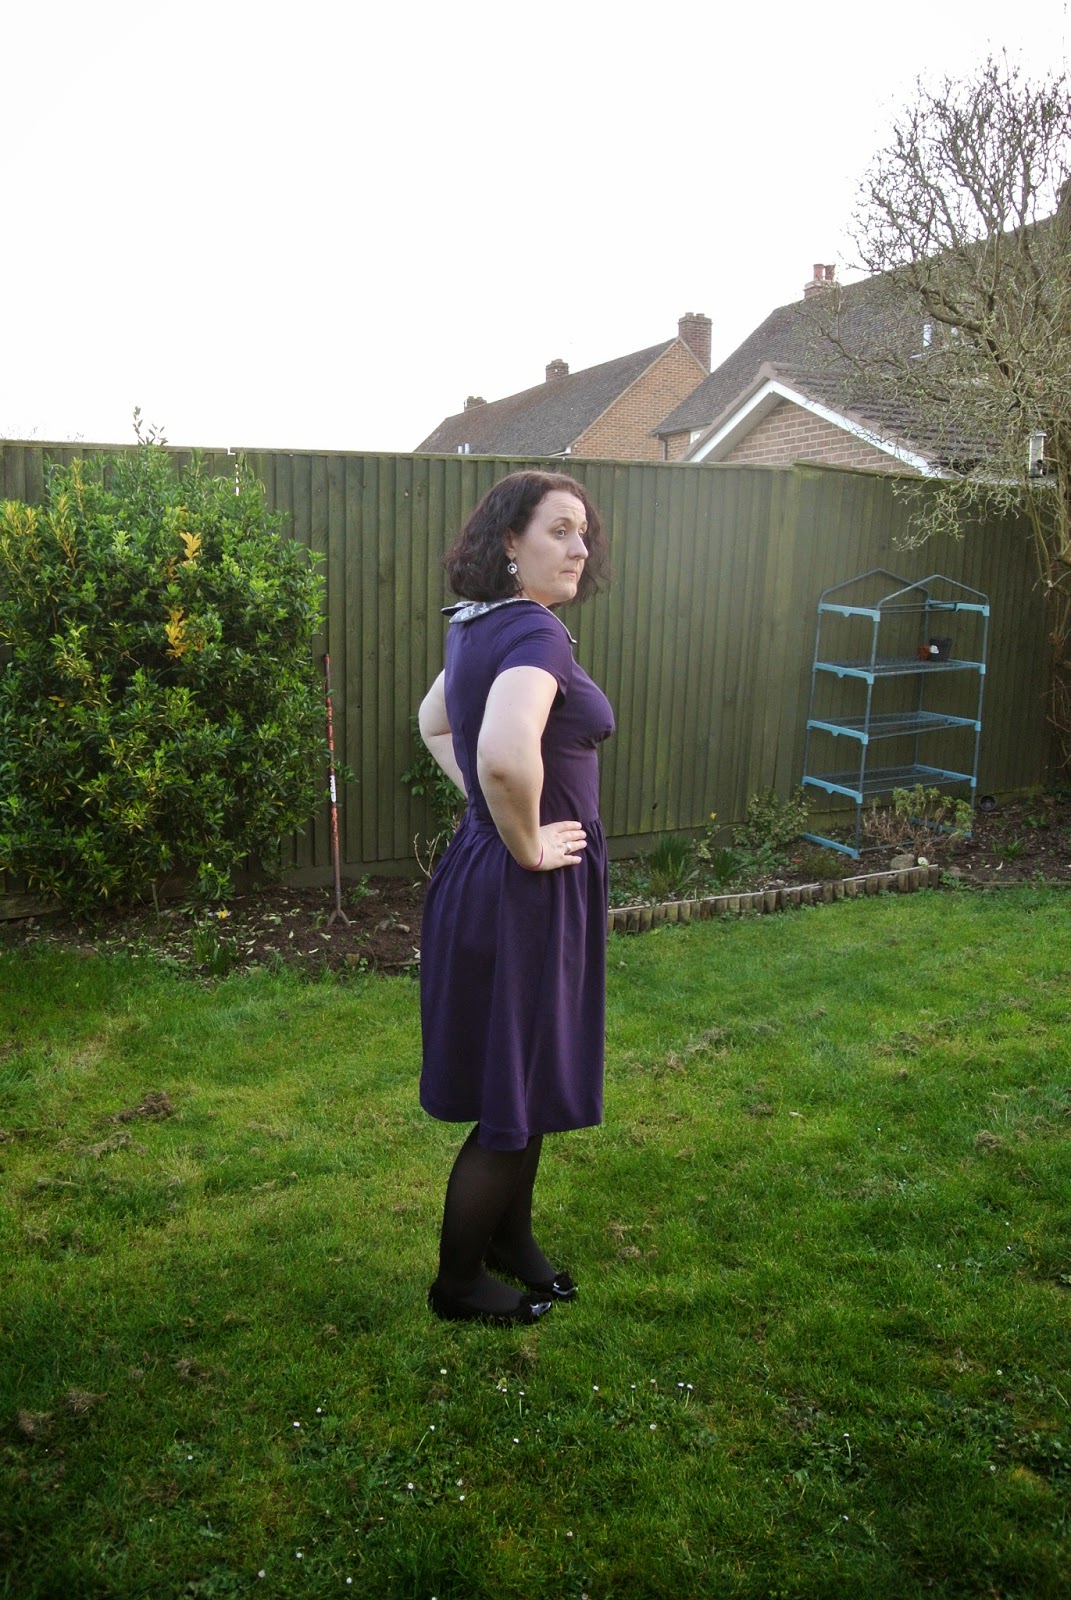
So here is my final coat!

I am so happy with it and it's an absolute pleasure to put it on every day. Of course the cost/effort per wear on a coat comes out pretty well which is satisfying! 
In this post, I'm showing off the final pics and will talk about fitting adjustments I made, and I'll show you details in another post. 


On comparing my actual measurements to my pattern measurements, I found I needed an FBA (no surprise), a little extra room at the hips/ bum level (another non - surprise) and more ease in the arms (I appear to have weirdly big elbows!). I also added 1/2" shoulder width and did a small square shoulder adjustment.

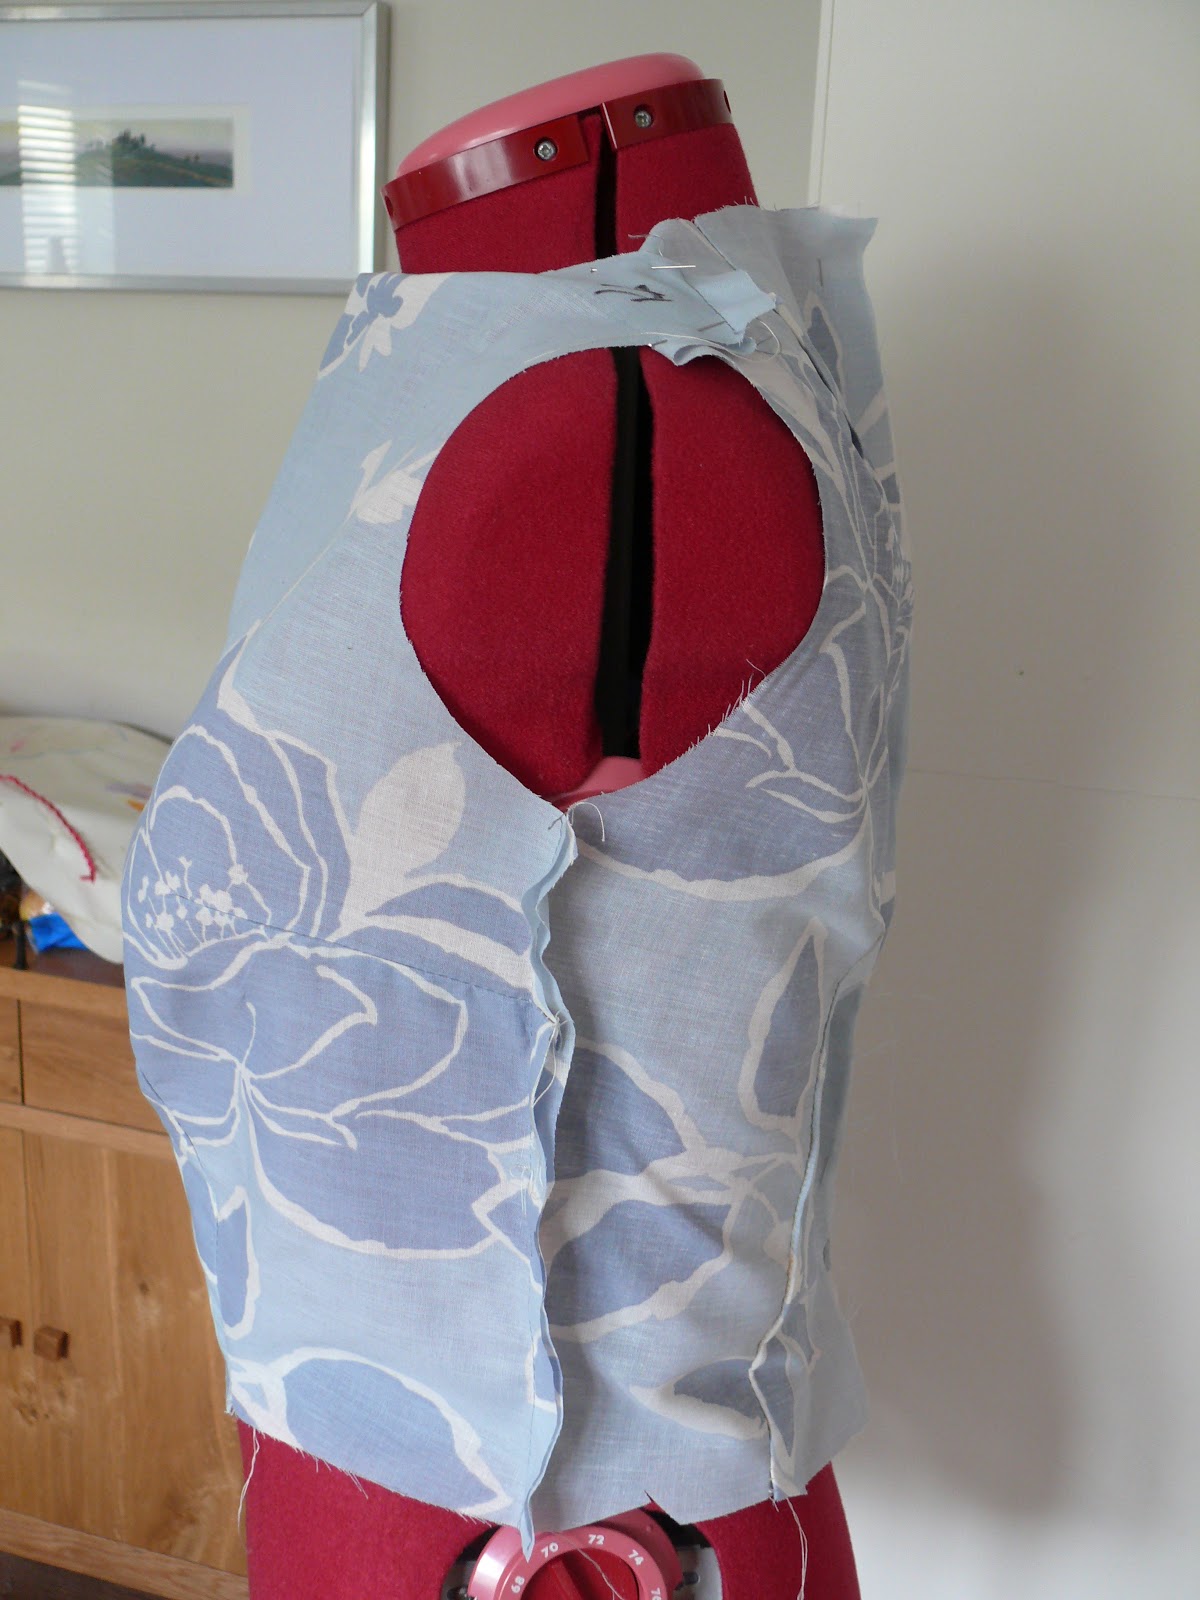
The front pattern piece was tough to adjust as it looked like this:


On the advice of lovely Brooke from Custom Style I had planned to cut it apart at the waist, but as I needed extra room at the hips too I was able to slash the pattern piece all the way down and add in some extra in the right places.

Should have taken my hands out of my pockets to photograph the back - that pulling isn't there without them!


The weirdest thing is that I did no length adjustments in the body at all! The waist was in the right place and the hem length was perfect.  In hindsight, the pockets could stand to be perhaps 1.5" lower  as it feels like I pull on them slightly when I put my hands in. But they are totally functional.  I also lengthened the sleeves to full length from bracelet length and as a result had to taper them slightly.


I muslined one sleeve and also the collar piece as I was concerned it looked a bit small in the picture (it's fine). However I decided to add darts to the back to take out some excess fabric at back waist. This was done by pinching out the right amount of fabric at waist level, splitting that between 2 darts and measuring where I wanted them to end top and bottom. I had a bit of trial and error in the dart positioning at first as I placed them too close to the side seams so I was glad I had just pinned them to begin with. Me and the seam ripper are too friendly as it is!  

In the final fabric I ended up taking in the side seams more to narrow the bodice to the waist as the shape as drafted  just wasn't working for me. Unfortunately I feel like I took a lot of the vintage flavour out of the coat, but it definitely works better for me this way. 

Details of the construction to follow! 

One last pic as it's a nice background!


Wednesday, 23 April 2014

Fella, this is a line i ain't biting. That's a bona fide offer. Well, with a little moonlight and roses...


So you know what this post is going to be about! Unless you have been living under a rock (or at least not keeping up with your sewing blog reading) you'll have heard about Sew Dolly Clackett organised by the fabulous Sarah from Rhinestones and Telephones. Sarah  had the great idea to celebrate the upcoming nuptials of the very lovely Roisin and Nic by making dresses in the style of Roisin herself. And let me tell you, that girl not only has great style and a presumably immense wardrobe/shoe storage area, she always gets a perfect fit and finish on her dresses. I've never seen her in one that looked less than perfect!

Anyway, enough gushing. What's the craic with this dress?


This is my second attempt at Christine Haynes Emery dress.  The first one was a total fitting fail that I blogged about here. So for this I went back to the drawing board, retraced the bodice and made another toile. I got some really helpful comments on my post before which helped improve this one. I lengthened the bodice by 2" and moved the darts down by 1". I did my usual 1/2" FBA.  One area that was a big problem in the previous version was the shoulder width. Based on measuring the previous one, I did a broad shoulder adjustment of 1" and a 5/8" square shoulder adjustment (which I often do).

I'm pleased with the fit. An extra 1" in bodice length wouldn't go amiss but it's pretty good as is!
I used the skirt (extra 2" length) and sleeve (widened by 1" to take account of shoulder adjustment and because it was a touch tight) that I had used before.

I am quite annoyed with the pics though - they were taken in a hurry before work this morning and the dress looks seriously wrinkly which it doesn't in real life.  Damn.


Now for the fabric. This was the hardest choice! How can you narrow down all the possibilities? Roisin says this is why she makes so many dresses! I wanted to reflect her style but also make something wearable for me, and much as I love her pin up girl dresses, they just aren't me! An idea had been brewing in my brain since I remembered asking roisin on twitter to recommend some fabric for a dress. She picked one of the prints from the Michael Miller Ahoy Matey collection for me, I think this one. So the nautical idea was there and a sale on nautical prints at fabric.com sealed the deal!

This is another Michael Miller fabric called My Favourite Ship from the Out To Sea collection.  N absolutely loves it. Of course my dress needs a name, so I asked her and she has called it the Neverland Pirates dress (from the cartoon series Jake and the Neverland Pirates).

I finished this dress with moments to spare due to a nasty 24 hour bug I had over the Easter weekend (that's prime sewing time dammit!). The hem was done at 10pm the night before and I did consider machining down the lining by stitching in the ditch at the waistline.  But then I thought WWRD (What Would Roisin Do?), stuck on an episode of Elementary and hand sewed it down.


Roisin and Nic are such a lovely couple and I'm proud to count them as friends. Wishing them all the best in their future married life together! And I can't wait to see the wedding dress roisin is making!

Thursday, 20 March 2014

The not-quite- right Emery


I wasn't sure whether to write this post but after much prompting on Twitter, here it is!

I don't have a lot of sewing fails really. I'm quite methodical and usually make a muslin but the end result here isn't good and I'm not quite sure why!

The pattern is Christine Haynes Emery dress. I love it so much and every other blogger has raved about it and the perfect fit (Roisin amd Tasha's versions are gorgeous). I bought some lovely but relatively pricy John Kaldor fabric in the Sew Essential sale in January and Emery seemed like the perfect pattern for it. I love a boat neck, could easily change up the skirt and there are collar options.
Luckily I decided to make a muslin using some cheap poly crepe I picked up. I had an idea in my head for a lace overlay on the collar and I used a silvery grey lace for this. 

OK so ignore my weird face - this is the only side pic
 
As the bodice is lined I used a navy cotton - the cheap poly against the skin would not be pleasant! I love lined bodices as in addition to looking and feeling nice, you can use them as the muslin.  I tissue fitted to work out length issues - I added 1" above the bust dart and 2" below and did my usual 1/2" FBA. I think this is where I went wrong however. I think I made the FBA too big (more like 1" - I really shouldn't eyeball. My eyeballs don't have a clue - or a tape measure) which accounts for some of the problems.  I suspect adding length above the bust was less correct than moving the dart down?  In the muslin the main issue appeared to be bagginess under the bust. I get this quite a lot and got some good advice to curve the bust darts to remove some bagginess. I think I made it too curved - probably due to excess at bust so it didn't press well. I did a square shoulder adjustment and added a little to the sleeve to match (and as I felt the sleeve might be a bit narrow anyway). I didn't muslin the skirt but added 3" in length after measuring.


The collar didn't attach easily either. I was easing the bodice into it a lot which gave some weird wrinkles - I asked about this on Twitter and no one else seems to have had this problem. I wonder if the crepe was stretching but the interfaced collar wasn't - the crepe stretching could account for a lot of the other problems!

I also didn't attach the  collar correctly - the centre front seam isn't in the right place when I look at other collared versions - Lauren and Kathy's and it doesn't press or sit very flat. I think this caused problems when I hand sewed the lining at the waistband. Also the shell seemed to need to be eased to the lining which suggests the shell stretched.

There were a few good things about it - the fabric has great drape and eased nicely into the waistband with even gathers. The sleeves went in perfectly first time. The invisible zip is perfect. 

The end result? A wrinkly pile of meh.


Just to be clear these are not issues with the pattern. It seems well drafted and the instructions are clear. I'm totally not giving up on it as I reckon I can fix the issues.
But I don't think this version is fixable and I suspect this is partly my too big FBA, partly the fabric and partly carelessness in attaching the collar and bodice.

What do you think? Could I /should I try and salvage it? Or start again with the right FBA? I'm not super attached to the fabric. It was and feels cheap and is tough to sew with and pin into. But I love the idea of the lace collar!

Can you give some fitting tips? Maybe a broad shoulder adjustment needed given the pulling at the shoulder? One observation is that the people who have blogged about getting a great fit were narrow across the shoulders which i am definitely not!  Or is it just not a good style for me and I should give it up?

Tuesday, 2 April 2013

Further adventures in fitting (with help from the #sewcialists)

This week I have enlisted the help of the fabulous #sewcialists on Twitter (why did I resist Twitter for so long?  I am addicted!) to help with some fitting issues I have been having.

I am working on the bodice for my Mad Men Challenge dress, using NL 6000 as a base.  I started with a tissue fit to determine length adjustment (always! In this case 2" which is less than usual - I have heard this bodice runs long) and correct dart placement (fine).  No point on making a muslin that definitely won't fit, is there?

I also decreased the seam allowances to give myself an extra 1" at the waist, and here is the first result:


Pretty bad, right?  I thought the wrinkles above the bust were to do with my square shoulders and so I added those strange flaps of blue fabric you can see in the first pic to test the theory of changing the shoulder, but to no avail.  To say nothing of the gaping armscye and wibbly neckline.  So I turned to the ladies of Twitter for advice, and as ever they delivered!

I was shocked to find out (as I have always considered myself to be amongst the small-of-bust) that I needed a small (1/2") FBA!

Here's the results for round 2:


A massive improvement I think!  Those annoying wrinkles are gone and neckline is lying flat (in real life at least - holding up the camera makes it look off in the top pic). 

It's not perfect though - there's still a lot of gaping in the armscye which needs to be addressed.  I thought about increasing the FBA but think it would have been too loose around the bust.  I might try a slightly larger FBA another time.

Following more Twitter advice from the lovely Rachel at House of Pinheiro (that girl is great trying to explain the process to me in 140 characters from her holiday in Brazil to see her family!) I pinned a dart at the armhole, transferred to the pattern and rotated the excess into the bust dart.


Minimal gapeage! (it actually does lie flatter than it looks when I am holding up the camera!)

I even tried a square shoulder adjustment on this to see if it made a difference:


I don't think it changed much in this case although I will bear it in mind for future!

But what a difference some great advice and a few muslins made to the fit.  From this:


to this:


Thanks to all the #sewcialists who helped, especially Laura at A Make-it-Yourself Mom's Diary, Rachel, Maris at Sew Maris and Brooke at Custom Style!  You guys...

I'm ready to start drafting the skirt now!


Thursday, 20 September 2012

WIP: Peony Toile

I've just started work on my Peony which is the next garment in the Sew Colette 2.0 sewalong.  I've had the pattern a while and I really love the simple shape and the boat neckline, which I tried to incorporate into the Disaster Dress (probably enough said about that!).

I bought a navy spot cotton a while back to make it, and am planning contrast red piping at the waist.  After recent zip/ piping difficulties, I am going to use a normal zip!


As this was meant to be a summer project I was planning the short sleeved version - i'm still going to make this and make it a wearable muslin for the longer sleeved winter version I'm got in my head.

First step - bodice muslin!  I made a lot of changes to the basic pattern before I started - i lengthened the bodice by 3", lowered the bust darts by 1", and because the lengthening seemed to make the waist darts too long, I shortened them by 2".


I've pinned up the shoulders as Marjorie isn't as long in that area as me!  It needs a bit more ease in the waist so I have added 1/2" to either side of the centre back.  It's very poofy under the bust (although more so on Marjorie then me!) so I have increased the length of the waist darts by 1" again and hopefully that will fix the problem.  I've also done a square shoulder adjustment of about 1/4" to eliminate drag lines above the bust.  Skirt will be lengthened by 2" to hit just above the knee.

So I'm ready to cut the fashion fabric and will pin fit these adjustments before I start sewing.

Thursday, 23 August 2012

Macaron Work in Progress

At the last minute I decided to throw my hat into the ring with the Sew Colette 2.0 Sewalong for the Macaron, hosted by Lucky Lucille, Miss Crayola Creepy and Rhinestones and Telephones.  It's one of the first patterns I really wanted to make but I was struggling to decide on fabric.  I wanted to do a winter version and had navy needlecord in mind with an orange contrast, but I couldn't find the right fabric to fit what I had in mind.  I thought I would have to give it a miss until a trip to John Lewis turned up some cute fabrics in the sale (so of course they had to be bought!
 
Although the colour isn't that clear in the photo, it's a dusty purple poplin for the shell and a lightweight cotton floral for the top part.  I love the way they look together and hopefully the dark colour will mean I can wear for winter with a cardigan.


Having decided on this at the last minute, I am a bit behind but have my bodice toile done.  After tissue fitting (as my main adjustment is for length, making a toile before doing this adjustment would be a waste of time) and adding 2" to the bodice length and 1" to the yoke, it looks OK.  I need to shorten the waist darts by about 2" as marked on the toile (I guess I should have left them the original length when I lengthened!), and I think the bust darts will need to be moved down as they definitely fall above the apex even with the extra 1" above - I think I'll have a look at some of the other versions online and see where they fall on other people as they definitely are right at the top of that pattern piece.


In the back view, you can see I have pinned the shoulders - Marjorie has a higher bust point than me - I can lengthen her waist but not above the bust!  It looks kind of baggy at the back but actually fits better on me.  I think I can adjust it fairly easily at the side seams to sort this out.  (And what is going on with my basting?  It went all weird and gathery - not sure if i need to adjust the tension so I'll definitely test of a scrap before starting on the fashion fabric!)

I'm off to work on the sleeves as I need to see the effect of adding that extra inch to the yoke.  I guess I will need to lengthen the sleeve cap.  Back to Fit for Real People!